Social Planner

Social Planner is a WordPress plugin for scheduling announcements of posts to your social networks accounts. The following providers are currently supported: Facebook, Twitter, VK.com, OK.ru, Telegram, LinkedIn, but you can easily add a new one yourself.

The whole process is completely automated. Just write a new post and either entire post or it’s nicely formatted announcement with backlink will be published to all your configured social networks. Plugin works with profiles, business pages, community pages, groups, etc.

Install Github
Social Planner WordPress plugin general screenshot

Installation #

Just search social-planner and activate the plugin from your admin dashboard. You can also manually upload the latest release to /wp-content/plugins and activate it.

Due to the restrictions of the WordPress scheduling system, announcements on social networks may be delayed. To avoid this, it is advisable to configure the work of the system cron. If you are unable to implement it yourself, contact your hoster or system administrator. Find more at WordPress plugin handbook.

Configuration #

Before using the plugin, you need to configure it. Immediately after installation, go to the plugin page. It is located in the Settings section. Here you need to add options for the required providers.

Pay attention to the Subtitle optional field on each provider. Fill it out if you want to use several accounts of the same social network or just for your convenience when scheduling.

Read the detailed configuration guide for each social network on a separate page.

Task scheduling #

Once you have configured the plugin, you can start scheduling social media announcements. Go to the post edit page and scroll to the end of the screen. There you will see the metabox for scheduling.

Social Planner task scheduling
This is how the metabox you need looks like.

Choose the time at which you want to schedule the release of the announcement, social networks and enter the text. If you want to attach a poster, click on the big button with a plus sign.

To delete the selected poster, click on the image again.

Some social networks allow you to generate a preview of the link and load the poster and other opengraph tags into the post. You can disable this by enabling the checkbox on the bottom right. Experiment with this behavior on test accounts to decide how you want to display links.

After filling in the meta box fields, update or publish the entry. If the time was chosen for the announcement, then the task will be automatically scheduled.

If the publication date of the post itself is later than the date of the task, then the announcement will be automatically rescheduled to the post release date.

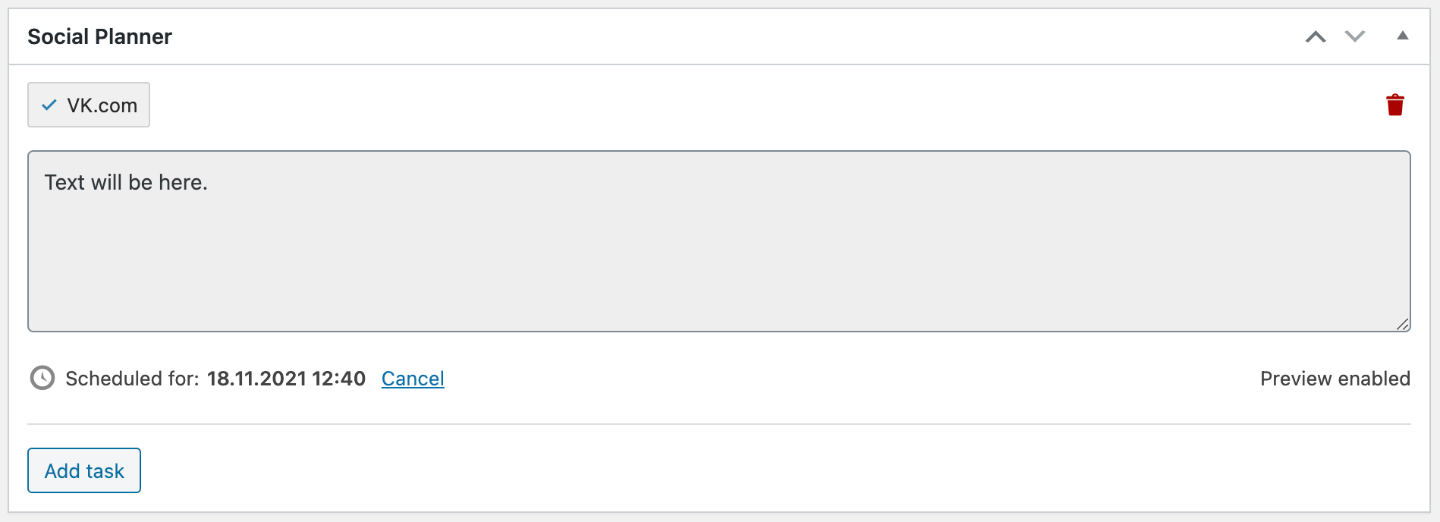
Social Planner task scheduling
Scheduled task.

After publishing, you will be able to see links to published posts in place of providers' checkboxes. Or errors in the same place in case of problems with sending.

Enhancement #

The plugin was originally designed as a framework, so it has a lot of extensibility. Besides adding your own provider, you can manage a lot of other settings and functions. Most of the plugin methods return WordPress hooks. To work with them you can write your own plugin or use your theme's functions.php file.

The entire list of actions and filters is collected on a separate page.

FAQ #

This section describes common problems when using the plugin and how to solve them. If you haven't found your question, it is best to ask it in the official repository on Github.

What is the difference between Twitter and Twitter API v2 providers? #

Recently Twitter banned the free use of its old API for new users. Use API v2 provider if you got the error “You currently have Essential access which includes access to Twitter API v2 endpoints only. If you need access to this endpoint, you’ll need to apply for Elevated access via the Developer Portal. Read more in the setup guide.

Can I avoid storing social networks tokens in the database? #

Yes, you can define a constant SOCIAL_PLANNER_PROVIDERS with your settings. The best place for this constant is in the file wp-config.php or in the functions.php.

Define provider key as {network_name}-{index}, where index is something alphanumeric and unique. You can see correct network name and all availible network fields in source code.

Show me an example
                    
                        define( 'SOCIAL_PLANNER_PROVIDERS', array(
                            'vk-1' => array(
                                'token' => 'token',
                                'group' => '-123',
                            ),

                            'telegram-1' => array(
                                'token' => '123:token',
                                'group' => '123',
                            ),

                            'facebook-1' => array(
                                'token' => 'token',
                                'group' => '123',
                                'title' => 'Facebook',
                            ),

                            'twitter-1' => array(
                                'consumer_key'    => 'key',
                                'consumer_secret' => 'secret',
                                'access_token'    => 'token',
                                'access_secret'   => 'secret'
                            )
                        ) );


How can I show the settings page only to some users? #

You can use filter social_planner_hide_settings.

Show me an example
                    
                        function my_hide_settings( $hide_settings ) {
                            $user = wp_get_current_user();

                            if ( empty( $user->user_login ) || 'admin' !== $user->user_login ) {
                                $hide_settings = true;
                            }

                            return $hide_settings;
                        }

                        add_filter( 'social_planner_hide_settings', 'my_hide_settings' );


Can I use html in the summary field when scheduling a new task? #

You can use only Markdown **text here** for bold and __text here__ for italic to beatify Telegram announcements.

How to hide the metabox for custom post types? #

Plugin shows metabox for all public post types except attachments. You can override this behavior with the social_planner_post_types filter.

Show me an example
                    
                        function my_post_types( $post_types ) {
                            // Remove metabox from pages.
                            foreach ( $post_types as $i => $name ) {
                                if ( 'page' === $name ) {
                                    unset( $post_types[ $i ] );
                                }
                            }

                            return $post_types;
                        }

                        add_filter( 'social_planner_post_types', 'my_post_types' );


What happens when you delete the plugin? #

By default, when uninstalling the plugin through the admin panel, all database options are deleted, including data on submitted tasks. If you want to keep them uninstall the plugin indirectly via the filesystem.

Can I add a new provider? #

Only 5 social networks are available for posting now. Some more are likely to be added soon, but until that happens, you might want to write your own extension. And it's not that hard to do.

You need to create a special social network class and connect it to the plugin. There is an Example of a non-existent network in below. Copy it and replace the information in the methods.

Your class must provide NETWORK_NAME constant and public static send_message method. You can see how the other classes of social networks of the plugin are implemented in the repository. Connect your class with a filter social_planner_networks.

Example of the provider class
                    
                        <?php

                        function add_example_network( $networks ) {
                            $networks['My_Network_Example'] = get_template_directory() . '/inc/class-network-example.php';

                            return $networks;
                        }

                        // This filter must execute before the `init` event.
                        add_filter( 'social_planner_networks', 'add_example_network' );

                        class My_Network_Example {
                           /**
                            * Unique network slug.
                            * Use latin alphanumeric characters and underscore only.
                            */
                            const NETWORK_NAME = 'example';

                            /**
                            * Return human-readable network label
                            */
                            public static function get_label() {
                                return 'Example';
                            }

                           /**
                            * Return network required settings fields
                            */
                            public static function get_fields() {
                                $fields = array(
                                    'token' => array(
                                        'label'       => 'Token',
                                        'placeholder' => '123456:ABC-DEF1234ghIkl-zyx57W2v1u123ew11',
                                        'required'    => true,
                                    ),

                                    'group' => array(
                                        'label'    => 'Group ID',
                                        'required' => true,
                                    ),

                                    'title' => array(
                                        'label' => 'Subtitle',
                                        'hint'  => 'Optional field.'
                                    ),
                                );

                                return $fields;
                            }

                           /**
                            * Send message method
                            *
                            * @param array $message  Message data.
                            * @param array $settings Settings array from options.
                            */
                            public static function send_message( $message, $settings ) {
                                // You should write this sending method using $message and $settings.
                                $response = self::my_sending_method( $message, $settings );

                                // If something went wrong you should return WP_Error.
                                if ( empty( $response ) ) {
                                    return new WP_Error( 'sending', 'Example sending error' );
                                }

                                // If it is ok, you should return a message link or ID.
                                return 'https://example.com/' . $response;
                            }


That's all you need. Now check if the new provider has appeared on the Settings page.